Bearing Press Tools Instructions
STEP 1: Know what bearings you have on your bike
The first step prior to tackling a suspension pivot bearing maintenance on your bike is to know what bearings you actually have. There are two efficient ways to get that information; the first one requires a phone or a computer and the second one requires some tools.
Option #1: Find the Technical Manual of your specific bike
You read that right. Most of the bike manufacturer will have a Technical Manual made specifically for your bike model. You should find a lot of useful information in that manual such as part numbers, torque specifications, parts orientation and also bearing numbers. Most of the time, all this information will be shown using exploded views of the bike.
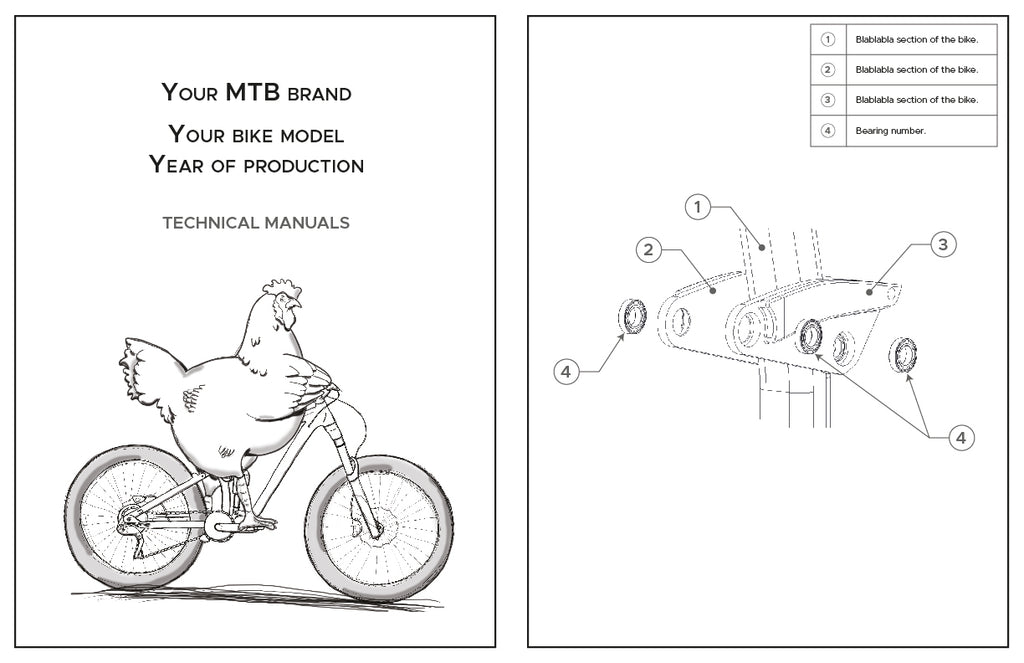
Option #2: Get your tools out and look directly on the bearings
This could looks obvious to you but a lot of people do not know this. Quality bearings usually have their bearing number written on their seals. To see that information, you will need to get your tools out and to get to a point where you can visually see your bearings. From there, the digits written on the seals will confirm which bearings are on your bike and which bearing press tools are needed to get the job done.

A little more data on mountain bike bearings (free stuff)
Mountain bike bearings are mostly made out of steel and are also refered to as cartridge bearing because... well they are balls in a cartridge. There are different quality of bearings available on the market using different materials, different constructions or different seals, just to name a few. It is important that you respect the overall bearing construction and size to ensure your new bearings will fit into their housings. Here is a quick view of the terms often used when speaking of bearing dimensions:

STEP 2: Select the proper Momentum Cycle Bearing Press Kits for the job!
Once you know what bearing press kits are needed for your bike, simply select the proper kits from our Bearing Press Collection page (link here)! All Momentum Cycle Bearing Press Kits are clearly identified with the bearing number they are meant to be used with. You can also find the bore diameter, outside diameter and width reference in all product descriptions on our website.

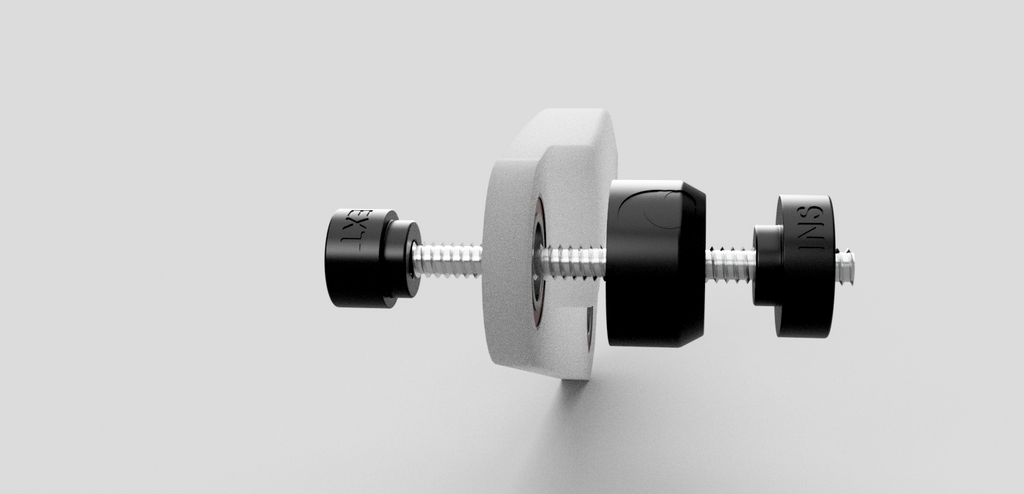
All parts of our Bearing Press Kits are also clearly identified. The EXT part is the one to use when extracting your bearings out of your frame. The INS part is the one to use when inserting your new bearings into your bike frame. The CUP is being used in all scenarios.

CAUTION: Ensure you can use a bearing press kit on your bike
We recommend to ensure you can use bearing press tools on your bike prior to starting the job. It is required to have a rear access to a bearing in order to extract it out of its housing with our tools. *Some bikes have integrated bearings in their frame; it won't be possible to use our kits to remove integrated bearings. That being said, our kits could be used for installation in such situation.

In order to use our Bearing Press Kits, you need to make sure you have enough clearance and that you have flat surfaces to work with. The CUP needs to sit on a flat surface to properly do its job.

STEP 3: Get your old bearings out
Always make sure all parts are aligned when proceeding to removing your bearings. Use the EXT section of the tool to extract bearings out of your bike, pressing the bearing towards the CUP as shown below. It will become harder to turn the main tool when extracting your bearings, but note that excessive force should never be used.

STEP 4: Get your new bearings in
It is recommended to clean and apply a slight layer of grease in the housings prior to inserting your new bearings. Use the INS section to insert your new bearings into your bike frame. The CUP is being used on the other side to give support.
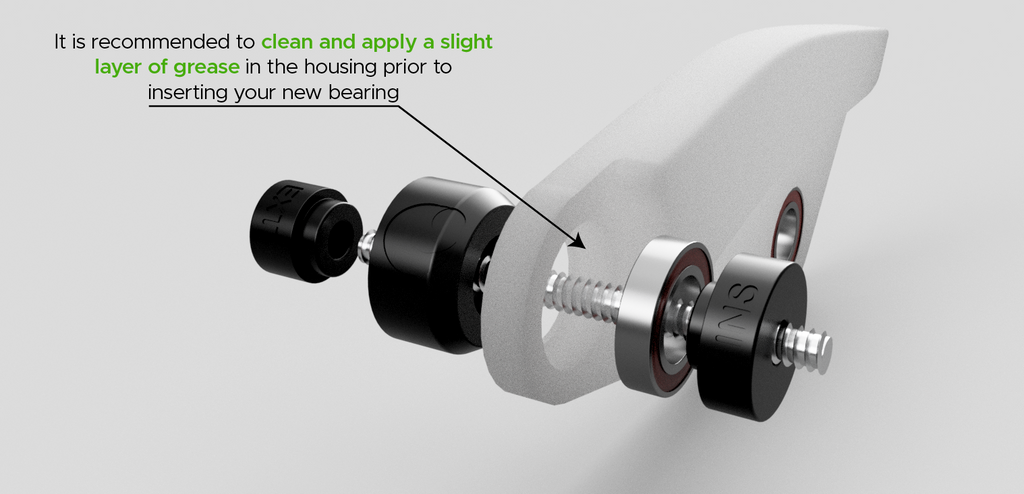
Here again, make sure everything is well aligned prior to inserting your new bearing. Pressing everything STRAIGHT is the key to ensure you don't damage your bike frame, your new bearing or your tools. Note that excessive force should never be used. Once you are done, have a look to your job to ensure your new bearing is sitting completely and properly in its housing.

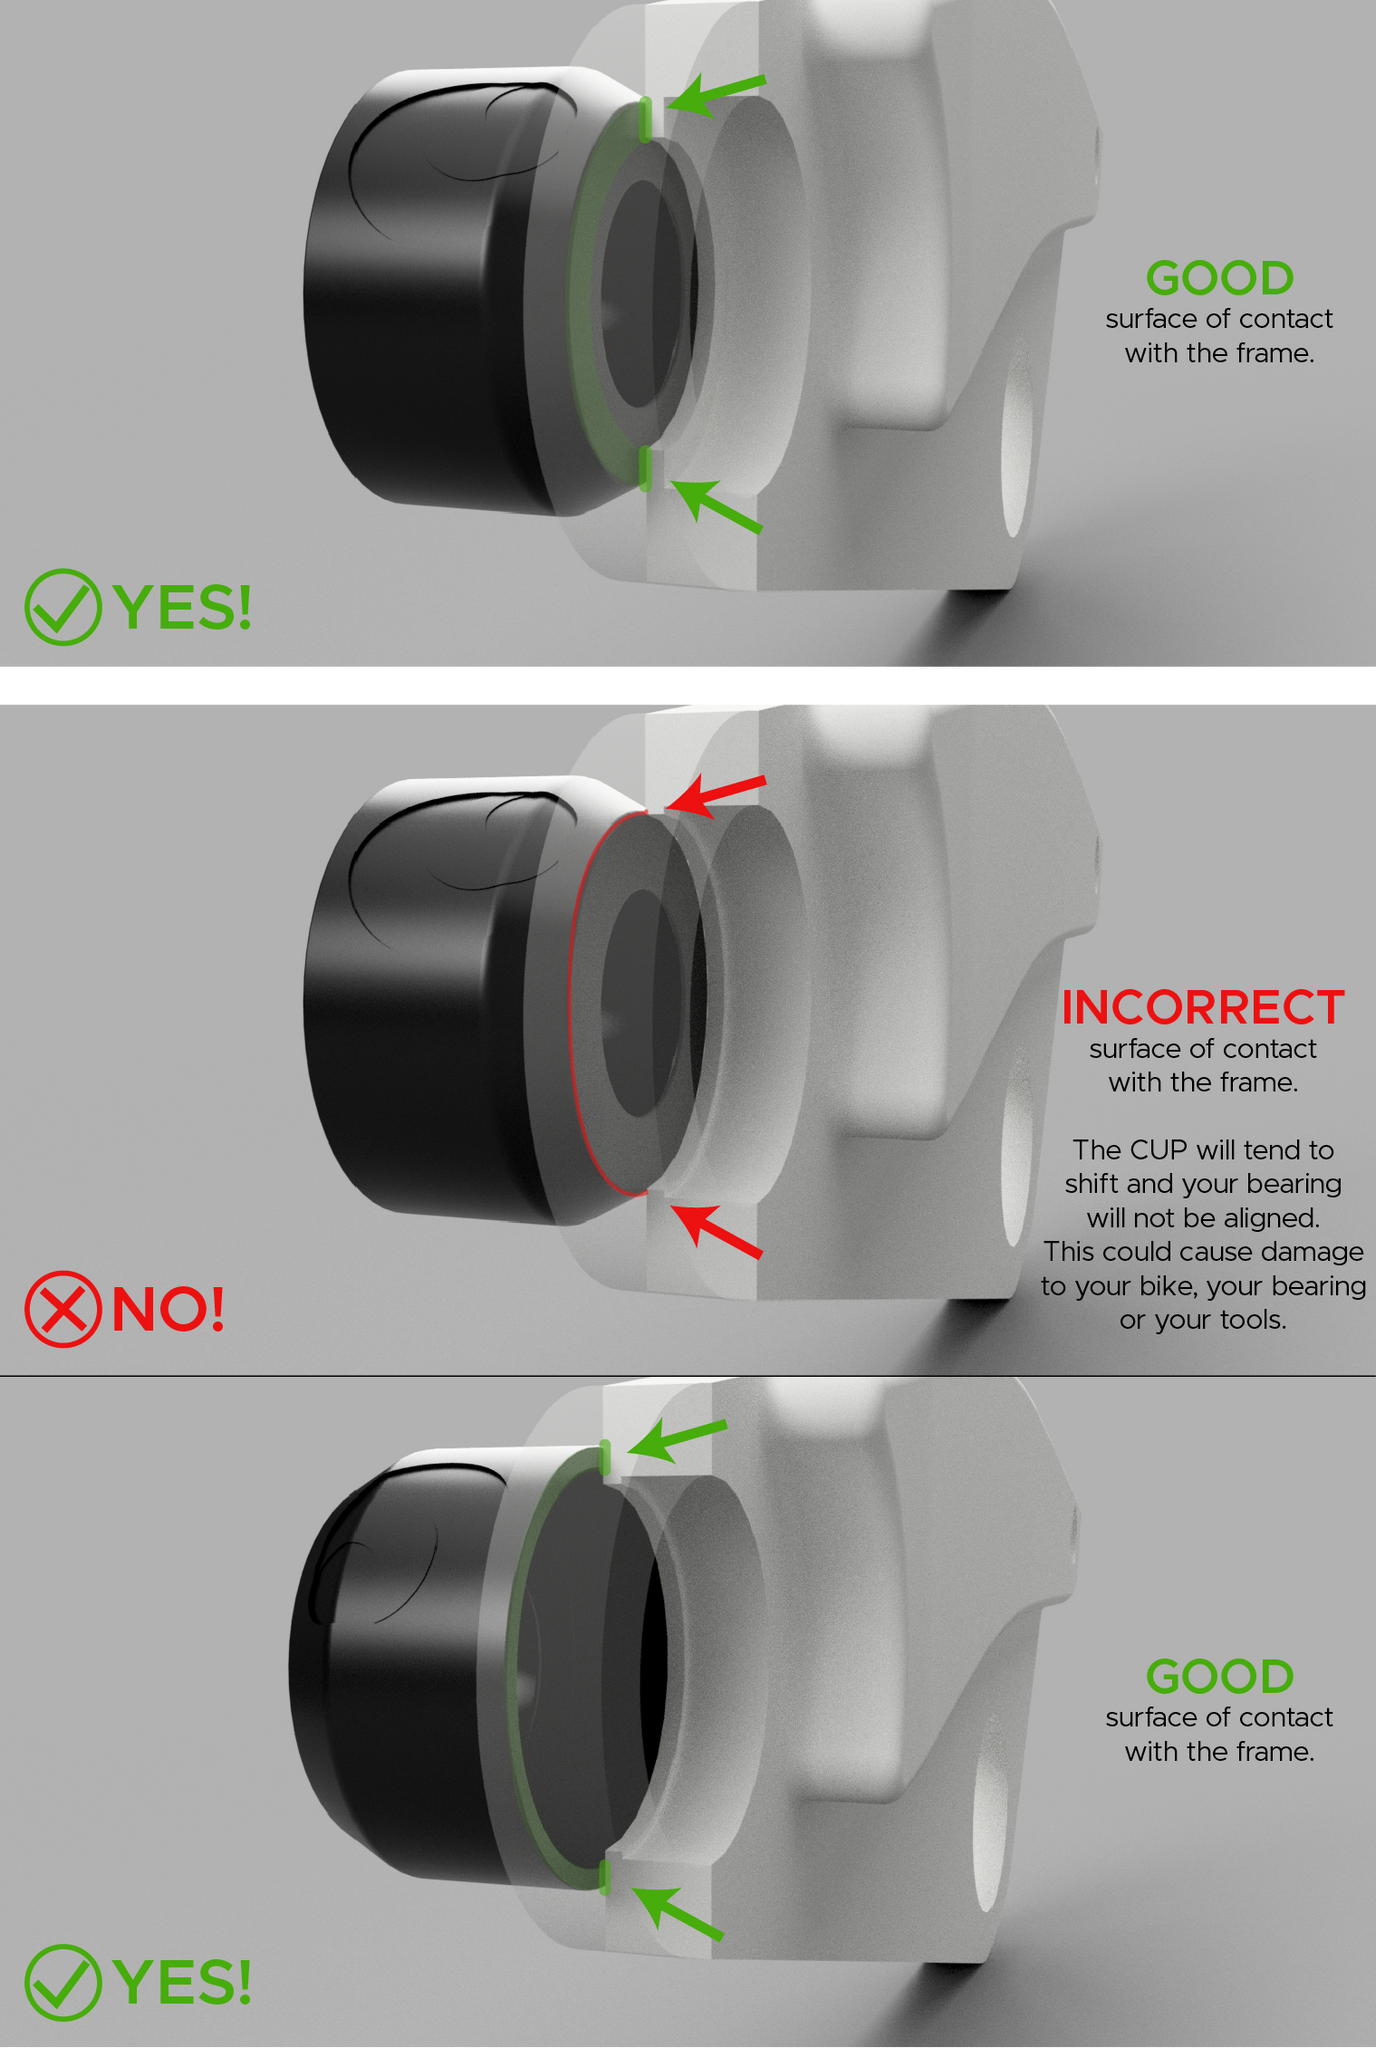
CAUTION: Make sure the CUP has a good contact with the bike frame
Make sure you have enough surface of the CUP in contact with the bike frame; the opening of the housing can vary from one bike to another. If you don't have enough surface of the CUP in contact with the bike frame, consider flipping the CUP around so that the open side of the CUP is in contact with the bike frame. The open side of the CUP being wider, it should give you more support in such situation.
Extended inner race compatibility
INS part to INSERT new bearings applies pressure on the outer race only and is compatible with extended inner ring bearings. Note that the bearing press kits made for small bearings do not have pilots on INS and EXT sections due to the small size of the bearing bore hole. The stainless steel threaded rod is used as pilot. See product description for more details.
![]()
![]()
![]()
*Additionnal information: When assembling your bike, always refer to your Technical Manuals to tighten everything at the manufacturer specs.
STEP 5: Go ride!
Disclaimer: Momentum Cycle Tools and Bike Parts has no liability, under no circumstances, for any damage or injury resulting from the use of our tools and products, or as a consequence of incorrect installation or improper use, to any other product used in conjunction with our Momentum Cycle Bearing Press Tools. It is the responsibility of the purchaser and user to ensure that our tools and products are used properly and safely. Our tools should be kept away and out of reach of children.
